Archives: Maîtriser l’affichage des catégories d’articles

Par défaut, votre thème de base (Underscore) affiche dans une catégorie la totalité du contenu de chaque article.
Cela n’est pas très ergonomique si vous avez beaucoup d’articles.

Il serait plus logique d’avoir un extrait du contenu et, si on souhaite en savoir plus: on clique pour obtenir la totalité du contenu de l’article.

Le concept

Le fichier archive.php

Observer le fichier archive.php

/* Start the Loop */
	while ( have_posts() ) :
	the_post();

	/*
	* Include the Post-Type-specific template for the content.
	* If you want to override this in a child theme, then include a file
	* called content-___.php (where ___ is the Post Type name) and that will be used instead.
	*/
	get_template_part( 'template-parts/content', get_post_type() );

	endwhile;

C’est un exemple d’application d’une boucle wordpress (loop). De quoi s’agit-il?

La Boucle (The Loop) est utilisée par WordPress pour afficher chacun de vos Articles. Par l’utilisation de La Boucle, WordPress traite tous les Articles devant être affichés sur la page active et adapte leur présentation en utilisant les critères décrits par les marqueurs de La Boucle. Tous les morceaux de code HTML ou PHP placés entre le début et la fin de La Boucle seront exécutés pour chaque Article.

Référence: https://codex.wordpress.org/fr:La_Boucle

Pour faire simple:

  • On cherche dans la base données.
  • On trouve x articles
  • Pour chacun d’eux, on cherche le modèle content.php qui se trouve dans le dossier « template-parts » et on l’affiche.

La customisation

Dans le dossier « template-parts »: Créer une copie de content.php et le renommer content-archive.php et éditez-le comme souhaité.

Exemple:

<?php
/**
 * Template part for displaying posts in an archive
 *
 * @link https://developer.wordpress.org/themes/basics/template-hierarchy/
 *
 * @package Fixiecity
 */

?>

<article id="post-<?php the_ID(); ?>" <?php post_class(); ?>>

         <?php the_post_thumbnail('thumbnail'); ?>

        <header class="entry-header">
                <?php the_title('<h2 class="entry-title">','</h2>'); ?>
        </header><!-- .entry-header -->

        <div class="entry-content">
		<?php the_excerpt(); ?>
        </div>

</article><!-- #post-<?php the_ID(); ?> -->

Il faut bien entendu, comme il s’agit uniquement d’un résumé, ajouter le(s) lien(s):

<?php
/**
 * Template part for displaying posts in an archive
 *
 * @link https://developer.wordpress.org/themes/basics/template-hierarchy/
 *
 * @package Fixiecity
 */

?>

<article id="post-<?php the_ID(); ?>" <?php post_class(); ?>>

        <a href="<?php the_permalink(); ?>">
            <?php the_post_thumbnail('thumbnail'); ?>
        </a>

        <header class="entry-header">
            <a href="<?php the_permalink(); ?>">
                <?php the_title('<h2 class="entry-title">','</h2>'); ?>
            </a>    
        </header><!-- .entry-header -->

        <div class="entry-content">
		<?php the_excerpt(); ?>
	</div><!-- .entry-content -->

    </div>
</div>

</article><!-- #post-<?php the_ID(); ?> -->

Et corriger le lien dans archive.php

/* Start the Loop */
	while ( have_posts() ) :
	the_post();

	/*
	* Include the Post-Type-specific template for the content.
	* If you want to override this in a child theme, then include a file
	* called content-___.php (where ___ is the Post Type name) and that will be used instead.
	*/
	get_template_part( 'template-parts/content-archive', get_post_type() );

	endwhile;

Mise en page particulière pour chaque catégorie.

Il est possible d’avoir, pour chaque catégorie, une mise en page particulière.
Nous n’utilisons alors plus archive.php mais category-slug.phpslug est le nom informatique de la catégorie (sans accent, espace ou majuscule).
On duplique archive.php et on le renomme selon la catégorie concernée.
On oublie pas de préciser le fichier de contenu.

Exemple: category-actualites.php

/* Start the Loop */
	while ( have_posts() ) :
	the_post();

	/*
	* Include the Post-Type-specific template for the content.
	* If you want to override this in a child theme, then include a file
	* called content-___.php (where ___ is the Post Type name) and that will be used instead.
	*/
	get_template_part( 'template-parts/content-category-actualites', get_post_type() );

	endwhile;

Exemple: content-category-actualites.php

/**
 * Template part for displaying posts in category actualites
 *
 * @link https://developer.wordpress.org/themes/basics/template-hierarchy/
 *
 * @package test
 */

<article id="post-<?php the_ID(); ?>" <?php post_class(); ?>>

        <header class="entry-header">
            <a href="<?php the_permalink(); ?>">
                <?php the_title('<h2 class="entry-title">','</h2>'); ?>
            </a>    
        </header><!-- .entry-header -->

        <div class="entry-content">
		<?php the_excerpt(); ?>
	</div><!-- .entry-content -->

    </div>
</div>

</article><!-- #post-<?php the_ID(); ?> -->

Cas particulier:

Vous avez 1 catégorie « shop » avec 3 sous-catégories: « accessoires », « bikes », « clothes ».
Vous créez un fichier « category-shop.php » avec un « content-category-shop » comme expliqué ci-dessus.

Le template s’appliquera (malheureusement) uniquement à la catégorie « shop »; et pas sur les sous-catégories « accessoires », « bikes », « clothes ».

Si vous souhaitez appliquer « category-shop.php » sur les sous catégories, ajouter ce code dans votre fichier functions.php


// force sub categories to use parent category templates
function wcs_force_use_parent_category_template() {

    $category = get_queried_object();
    $templates = array();

    // Add default category template files
    $templates[] = "category-{$category->slug}.php";
    $templates[] = "category-{$category->term_id}.php";

    if ( $category->category_parent != 0 ) {
        $parent = get_category( $category->category_parent );

        if ( !empty($parent) ) {
            $templates[] = "category-{$parent->slug}.php";
            $templates[] = "category-{$parent->term_id}.php";
        }
    }

    $templates[] = 'category.php';
    return locate_template( $templates );
}
add_filter( 'category_template', 'wcs_force_use_parent_category_template' );

Référence: http://wpcodesnippet.com/force-sub-categories-use-parent-category-templates/
single.php: l’affichage de l’article

Le concept

Le fichier single.php

<?php
while ( have_posts() ) :
the_post();

	get_template_part( 'template-parts/content', get_post_type() );

	the_post_navigation(
		array(
                    ...
		);

	if ( comments_open() || get_comments_number() ) :
                    ...
	endif;

endwhile; // End of the loop.
?>

Si un article est trouvé: on cherche de template content.php et on l’affiche

Donc si on désire changer l’affichage de l’article: il faut ouvrir et modifier le fichier content.php

Le fichier content.php

<article id="post-<?php the_ID(); ?>" <?php post_class(); ?>>
	<header class="entry-header">
		<?php
		if ( is_singular() ) :
			the_title( '<h1 class="entry-title">', '</h1>' );
		else :
			the_title( '<h2 class="entry-title"><a href="' . esc_url( get_permalink() ) . '" rel="bookmark">', '</a></h2>' );
		endif;

		if ( 'post' === get_post_type() ) :
			?>
			<div class="entry-meta">
				<?php
				test_posted_on();
				test_posted_by();
				?>
			</div><!-- .entry-meta -->
		<?php endif; ?>
	</header><!-- .entry-header -->

	<?php test_post_thumbnail(); ?>

	<div class="entry-content">
		<?php
		the_content(
			sprintf(
				wp_kses(
					/* translators: %s: Name of current post. Only visible to screen readers */
					__( 'Continue reading<span class="screen-reader-text"> "%s"</span>', 'test' ),
					array(
						'span' => array(
							'class' => array(),
						),
					)
				),
				wp_kses_post( get_the_title() )
			)
		);

		wp_link_pages(
			array(
				'before' => '<div class="page-links">' . esc_html__( 'Pages:', 'test' ),
				'after'  => '</div>',
			)
		);
		?>
	</div><!-- .entry-content -->

	<footer class="entry-footer">
		<?php test_entry_footer(); ?>
	</footer><!-- .entry-footer -->
</article><!-- #post-<?php the_ID(); ?> -->

On peut le simplifier celui- comme suit:

<article id="post-<?php the_ID(); ?>" <?php post_class(); ?>>
	<header class="entry-header">
		<?php the_title( '<h2 class="entry-title">'</h2>' );?>
	</header><!-- .entry-header -->

	<?php test_post_thumbnail(); ?>

	<div class="entry-content">
		<?php
		the_content(
			sprintf(
				wp_kses(
					/* translators: %s: Name of current post. Only visible to screen readers */
					__( 'Continue reading<span class="screen-reader-text"> "%s"</span>', 'test' ),
					array(
						'span' => array(
							'class' => array(),
						),
					)
				),
				wp_kses_post( get_the_title() )
			)
		);

		wp_link_pages(
			array(
				'before' => '<div class="page-links">' . esc_html__( 'Pages:', 'test' ),
				'after'  => '</div>',
			)
		);
		?>
	</div><!-- .entry-content -->

	<footer class="entry-footer">
		<?php test_entry_footer(); ?>
	</footer><!-- .entry-footer -->
</article><!-- #post-<?php the_ID(); ?> -->

L’ordre des éléments peut être modifier:

<article id="post-<?php the_ID(); ?>" <?php post_class(); ?>>

        <?php test_post_thumbnail(); ?>

	<header class="entry-header">
		<?php the_title( '<h2 class="entry-title">'</h2>' );?>
	</header><!-- .entry-header -->

	<div class="entry-content">
		<?php the_content(); ?>
	</div><!-- .entry-content -->

	<footer class="entry-footer">
		<?php test_entry_footer(); ?>
	</footer><!-- .entry-footer -->
</article><!-- #post-<?php the_ID(); ?> -->

Ou des éléments supprimer, en le commentant (en php: // devant la ligne):

<article id="post-<?php the_ID(); ?>" <?php post_class(); ?>>

        <?php // test_post_thumbnail(); ?>

	<header class="entry-header">
		<?php the_title( '<h2 class="entry-title">'</h2>' );?>
	</header><!-- .entry-header -->

	<div class="entry-content">
		<?php the_content(); ?>
	</div><!-- .entry-content -->

	<footer class="entry-footer">
		<?php test_entry_footer(); ?>
	</footer><!-- .entry-footer -->
</article><!-- #post-<?php the_ID(); ?> -->

Bootstrap 5: Les breackpoints

Voici les principaux breakpoints de bootstrap:


/* X-Small devices (portrait phones, less than 576px)
No media query for `xs` since this is the default in Bootstrap*/

/* sm - Small devices (landscape phones, 576px and up)*/
@media screen and (min-width: 576px) {   }

/* md - Medium devices (tablets, 768px and up) */
@media screen and (min-width: 768px) {   }

/* lg - Large devices (desktops, 992px and up) */
@media screen and (min-width: 992px) {   }

/* xl - X-Large devices (large desktops, 1200px and up)*/
@media screen and (min-width: 1200px) {   }

/* xxl - XX-Large devices (larger desktops, 1400px and up)*/
@media screen and (min-width: 1400px) {   }


Les shortcodes

Un premier Shortcode qui affiche les titres des 5 derniers articles

A copier dans votre fichier functions.php


add_shortcode( 'query_shortcode', 'query_shortcode_function' );
function query_shortcode_function() {
    $buffer = '<h3>Shortcode: 5 derniers articles</h3>';
    $q = new WP_Query(array(
        'post_type' => 'post',
        'posts_per_page' => 5
    ));
    while ($q->have_posts()) {
        $q->the_post();
        $buffer = $buffer.get_the_title().'<br>';
    }
    wp_reset_postdata();
    return $buffer;
}

A insérer là où vous souhaiter le faire apparaître

[query_shortcode]

Une adaptation qui affiche les titres des 3 derniers articles ainsi que le résumé dans une grille d’article


add_shortcode( 'query_shortcode', 'query_shortcode_function' );
function query_shortcode_function() {
    $buffer = '<h3>Shortcode: 3 derniers articles</h3><div class="shortcode-grid">';
    $q = new WP_Query(array(
        'post_type' => 'post',
        'posts_per_page' => 3
    ));
    while ($q->have_posts()) {
        $q->the_post();
        $buffer = $buffer.'<article class="shortcode-grid-item">';
        $buffer = $buffer.'<h3>'.get_the_title().'</h3>';
        $buffer = $buffer.'<div class="shortcode-grid-item-excerpt">'.get_the_excerpt().'</div><!-- .shortcode-grid-item-excerpt -->';
        $buffer = $buffer.'</article>';
    }
    wp_reset_postdata();
    $buffer = $buffer.'</div><!-- .shortcode-grid -->';
    return $buffer;
}

Références:

https://wpshout.com/quick-guides/using-wp_query-first-time-shortcode-show-post-titles/


https://kinsta.com/fr/blog/shortcodes-wordpress/
https://codex.wordpress.org/Shortcode_API

Des plugins (indispensables?… ou pas !)

Les indispensables?

Référencement

Formulaire de contact

Pour afficher des articles

Utilitaires bien pratiques

MapBox: plusieurs markers personnalisés avec Infobox On Click

Le cosde est le même mais au moment de Convertir vos markers en un élément html :

&lt;div id='map' style='width: 100%; height: 100vh'>&lt;/div>
&lt;script>
        mapboxgl.accessToken = 'votrecodepersonnelquevousdevezrestreindre';
        
        var map = new mapboxgl.Map({
        container: 'map',
        style: 'mapbox://styles/...',
        zoom: 13,
        center: [6.1430, 46.2048]
        });
        
        // Add zoom and rotation controls to the map.
        map.addControl(new mapboxgl.NavigationControl(),'bottom-right');

        var geojson ={
              type: 'FontaineCollection',
              features: [{
                  
                type: 'Fontaine',
                geometry: {
                  type: 'Point',
                  coordinates: [6.14091, 46.20634]
                },
                properties: {
                  title: 'Fontaine de Saint-Gervais',
                  description: 'Eglise de Saint-Gervais',
                  category:'potable'
                }
                
              },
               {
                type: 'Fontaine',
                geometry: {
                  type: 'Point',
                  coordinates: [6.14921, 46.20035 ]
                },
                properties: {
                  title: 'Fontaine du Bourg-de-Four',
                  description: 'Place du Bourg-de-Four',
                    category:'potable'
                }
               },
               {
                type: 'Fontaine',
                geometry: {
                  type: 'Point',
                  coordinates: [6.15237, 46.20413]
                },
                properties: {
                  title: 'Fontaine des 4 saisons',
                  description: 'Jardin anglais',
                 category:'non-potable'
                }
                
              }]
            }; 

        
        // add markers to map
        geojson.features.forEach(function(marker) {

          // create a HTML element for each feature
          var el = document.createElement('div');
          el.className = 'marker' + ' ' + marker.properties.category;

          // make a marker for each feature and add to the map
          new mapboxgl.Marker(el)
            .setLngLat(marker.geometry.coordinates)
            .setPopup(new mapboxgl.Popup({ offset: 25 }) // add popups
            .setHTML('&lt;h3>' + marker.properties.title + '&lt;/h3>&lt;p>' + marker.properties.description + '&lt;/p>'))
            .addTo(map);
        });

        
&lt;/script>

Stylez le popup html dans votre css

.mapboxgl-popup {
  max-width: 200px;
}

.mapboxgl-popup-content {
  text-align: center;
  font-family: 'Open Sans', sans-serif;
}


Référence: https://docs.mapbox.com/help/tutorials/custom-markers-gl-js/

MapBox: plusieurs markers personnalisés

Créer votre carte initiale

&lt;div id='map' style='width: 100%; height: 100vh'>&lt;/div>
&lt;script>
        mapboxgl.accessToken = 'votrecodepersonnelquevousdevezrestreindre';
        
        var map = new mapboxgl.Map({
        container: 'map',
        style: 'mapbox://styles/...',
        zoom: 13,
        center: [6.1430, 46.2048]
        });
        
        // Add zoom and rotation controls to the map.
        map.addControl(new mapboxgl.NavigationControl(),'bottom-right');
        
&lt;/script>


Ajouter vos markers dans un Json
Noté l’ajout d’une catégorie

&lt;div id='map' style='width: 100%; height: 100vh'>&lt;/div>
&lt;script>
        mapboxgl.accessToken = 'votrecodepersonnelquevousdevezrestreindre';
        
        var map = new mapboxgl.Map({
        container: 'map',
        style: 'mapbox://styles/...',
        zoom: 13,
        center: [6.1430, 46.2048]
        });
        
        // Add zoom and rotation controls to the map.
        map.addControl(new mapboxgl.NavigationControl(),'bottom-right');

 var geojson ={
              type: 'FontaineCollection',
              features: [{
                  
                type: 'Fontaine',
                geometry: {
                  type: 'Point',
                  coordinates: [6.14091, 46.20634]
                },
                properties: {
                  title: 'Fontaine de Saint-Gervais',
                  description: 'Eglise de Saint-Gervais',
                  category:'potable'
                }
                
              },
               {
                type: 'Fontaine',
                geometry: {
                  type: 'Point',
                  coordinates: [6.14921, 46.20035 ]
                },
                properties: {
                  title: 'Fontaine du Bourg-de-Four',
                  description: 'Place du Bourg-de-Four',
                    category:'potable'
                }
               },
               {
                type: 'Fontaine',
                geometry: {
                  type: 'Point',
                  coordinates: [6.15237, 46.20413]
                },
                properties: {
                  title: 'Fontaine des 4 saisons',
                  description: 'Jardin anglais',
                 category:'non-potable'
                }
                
              }]
            }; 


&lt;/script>

Convertissez vos markers en un éléments html

&lt;div id='map' style='width: 100%; height: 100vh'>&lt;/div>
&lt;script>
        mapboxgl.accessToken = 'votrecodepersonnelquevousdevezrestreindre';
        
        var map = new mapboxgl.Map({
        container: 'map',
        style: 'mapbox://styles/...',
        zoom: 13,
        center: [6.1430, 46.2048]
        });
        
        // Add zoom and rotation controls to the map.
        map.addControl(new mapboxgl.NavigationControl(),'bottom-right');

        var geojson ={
              type: 'FontaineCollection',
              features: [{
                  
                type: 'Fontaine',
                geometry: {
                  type: 'Point',
                  coordinates: [6.14091, 46.20634]
                },
                properties: {
                  title: 'Fontaine de Saint-Gervais',
                  description: 'Eglise de Saint-Gervais',
                  category:'potable'
                }
                
              },
               {
                type: 'Fontaine',
                geometry: {
                  type: 'Point',
                  coordinates: [6.14921, 46.20035 ]
                },
                properties: {
                  title: 'Fontaine du Bourg-de-Four',
                  description: 'Place du Bourg-de-Four',
                    category:'potable'
                }
               },
               {
                type: 'Fontaine',
                geometry: {
                  type: 'Point',
                  coordinates: [6.15237, 46.20413]
                },
                properties: {
                  title: 'Fontaine des 4 saisons',
                  description: 'Jardin anglais',
                 category:'non-potable'
                }
                
              }]
            }; 

        
        // add markers to map
        geojson.features.forEach(function(marker) {

          // create a HTML element for each feature
          var el = document.createElement('div');
          el.className = 'marker' + ' ' + marker.properties.category;

          // make a marker for each feature and add to the map
          new mapboxgl.Marker(el)
            .setLngLat(marker.geometry.coordinates)
            .addTo(map);
        });

        
&lt;/script>

Grâce à cet élément el.className = ‘marker’ + ‘ ‘ + marker.properties.category; la catégorie est passée comme classe supplémentaire… et donc il est possible d’attribuer un style différent

Stylez l’élément html dans votre css

.marker {
  background-image: url('images/VZA.svg');
  background-size: cover;
  background-color: white;
  width: 40px;
  height: 40px;
  border-radius: 50%;
  cursor: pointer;
}

.marker.non-potable{
    background-color: red;
}


Référence: https://docs.mapbox.com/help/tutorials/custom-markers-gl-js/

MapBox: un marker personnalisé

Créer votre carte initiale

&lt;div id='map' style='width: 100%; height: 100vh'>&lt;/div>
&lt;script>
        mapboxgl.accessToken = 'votrecodepersonnelquevousdevezrestreindre';
        
        var map = new mapboxgl.Map({
        container: 'map',
        style: 'mapbox://styles/...',
        zoom: 13,
        center: [6.1430, 46.2048]
        });
        
        // Add zoom and rotation controls to the map.
        map.addControl(new mapboxgl.NavigationControl(),'bottom-right');
        
&lt;/script>


Ajouter votre marker dans un Json

&lt;div id='map' style='width: 100%; height: 100vh'>&lt;/div>
&lt;script>
        mapboxgl.accessToken = 'votrecodepersonnelquevousdevezrestreindre';
        
        var map = new mapboxgl.Map({
        container: 'map',
        style: 'mapbox://styles/...',
        zoom: 13,
        center: [6.1430, 46.2048]
        });
        
        // Add zoom and rotation controls to the map.
        map.addControl(new mapboxgl.NavigationControl(),'bottom-right');


// Markers Json
var geojson = {
  type: 'FeatureCollection',
  features: [{
    type: 'Feature',
    geometry: {
      type: 'Point',
      coordinates: [6.14091, 46.20634]
    },
    properties: {
      title: 'Fontaine',
      description: 'Saint-Gervais'
    }
  }]
};


&lt;/script>

Convertissez votre marker en un élément html

&lt;div id='map' style='width: 100%; height: 100vh'>&lt;/div>
&lt;script>
        mapboxgl.accessToken = 'votrecodepersonnelquevousdevezrestreindre';
        
        var map = new mapboxgl.Map({
        container: 'map',
        style: 'mapbox://styles/...',
        zoom: 13,
        center: [6.1430, 46.2048]
        });
        
        // Add zoom and rotation controls to the map.
        map.addControl(new mapboxgl.NavigationControl(),'bottom-right');

// Markers Json
var geojson = {
  type: 'FeatureCollection',
  features: [{
    type: 'Feature',
    geometry: {
      type: 'Point',
      coordinates: [6.14091, 46.20634]
    },
    properties: {
      title: 'Fontaine',
      description: 'Saint-Gervais'
    }
  }]
};

// add markers to map
geojson.features.forEach(function(marker) {

  // create a HTML element for each feature
  var el = document.createElement('div');
  el.className = 'marker';

  // make a marker for each feature and add to the map
  new mapboxgl.Marker(el)
    .setLngLat(marker.geometry.coordinates)
    .addTo(map);
});

        
&lt;/script>


Stylez l’élément html dans votre css

.marker {
  background-image: url('images/VZA.svg');
  background-size: cover;
  background-color: white;
  width: 40px;
  height: 40px;
  border-radius: 50%;
  cursor: pointer;
}


Référence: https://docs.mapbox.com/help/tutorials/custom-markers-gl-js/

Intégrer une carte OpenStreetMap personnalisée avec Mapbox

1) Créer un compte sur mapbox.com

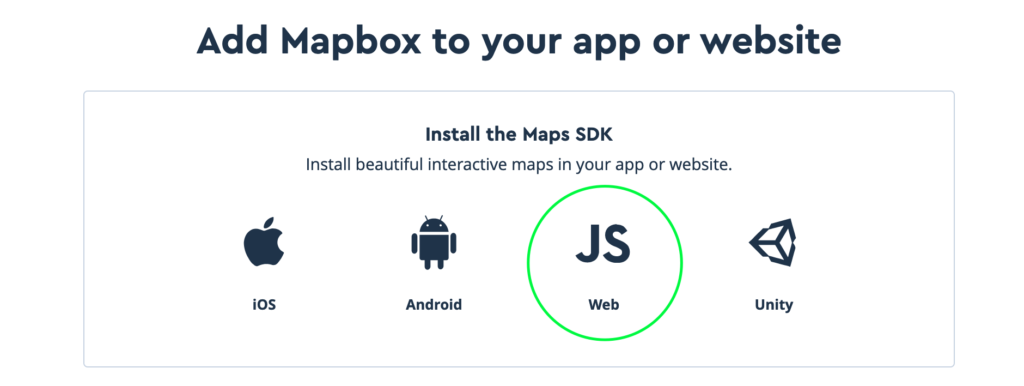
2) Choisissez le type d’API (Application Programming Interface)

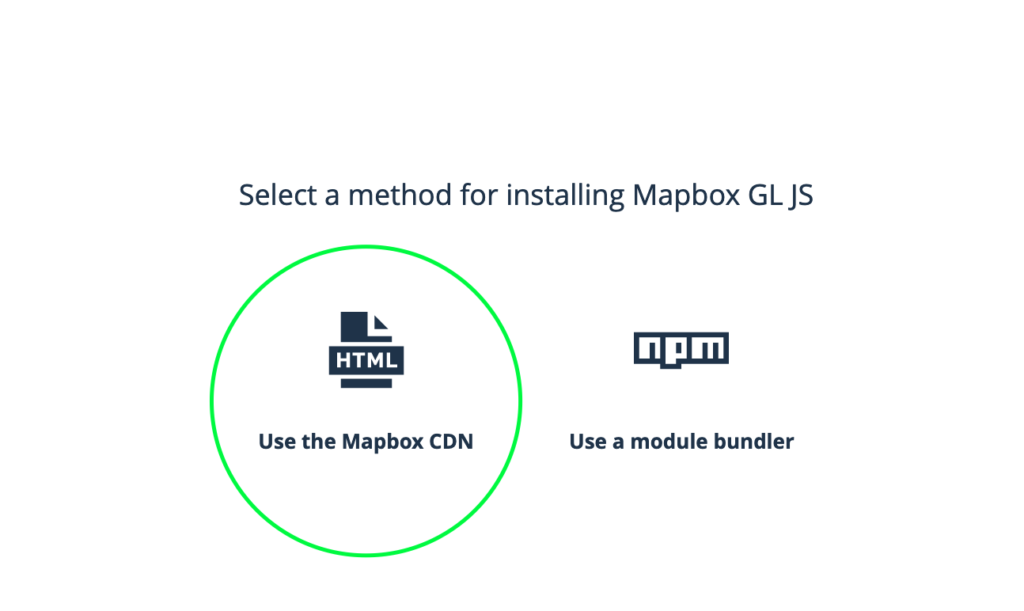
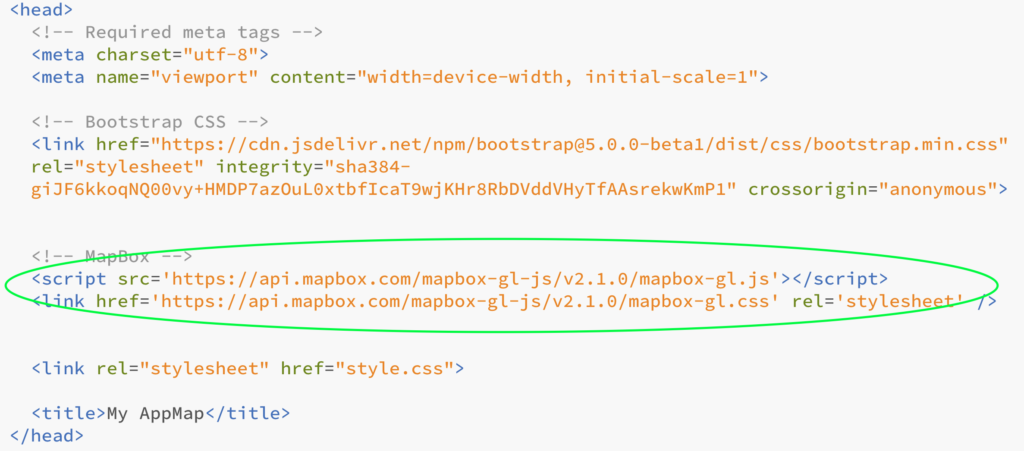
3) Copier les liens des scripts et coller-les dans le header de votre fichier html

4) Copier le code d’intégration de votre carte dans le body de votre fichier html.

Vous pouver adapter le format de votre carte directement ici

Customisation

&lt;script>
        mapboxgl.accessToken = 'votrecodepersonnelquevousdevezrestreindre';
        var map = new mapboxgl.Map({
        container: 'map',
        style: 'mapbox://styles/...',
        zoom: 13,
        center: [6.1430, 46.2048]
        });
&lt;/script>
  • mapboxgl.accessToken: Votre token personnel à restreindre sur l’url de publication
  • style: Lien sur votre style personnalisé
  • zoom: zoom!
  • center: Position de la carte au chargement

Ajouter une interface de navigation, positionnée en bas à droite

&lt;script>
        mapboxgl.accessToken = 'votrecodepersonnelquevousdevezrestreindre';
        var map = new mapboxgl.Map({
        container: 'map',
        style: 'mapbox://styles/...',
        zoom: 13,
        center: [6.1430, 46.2048]
        });
        
        // Add zoom and rotation controls to the map.
        map.addControl(new mapboxgl.NavigationControl(),'bottom-right');
        
&lt;/script>

Ajouter un marker

&lt;script>
        mapboxgl.accessToken = 'votrecodepersonnelquevousdevezrestreindre';
        var map = new mapboxgl.Map({
        container: 'map',
        style: 'mapbox://styles/...',
        zoom: 13,
        center: [6.1430, 46.2048]
        });
        
        // Add zoom and rotation controls to the map.
        map.addControl(new mapboxgl.NavigationControl(),'bottom-right');

        // Add markers to the map.
        var marker = new mapboxgl.Marker()
        .setLngLat([6.14091, 46.20634])
        .addTo(map);
        
&lt;/script>

Référence: https://docs.mapbox.com/mapbox-gl-js/api/

Créer des liens internes dans une page

Etape 1:
définissez des « ancres » dans votre page.

Vous sélectionnez un bloc gutenberg et dans la colonne de droite, vous pouvez lui attribuer une ancre

Etape 2:
définissez des « ancres » dans votre page.

Vous créer un lien en définissant ça valeur par #votreancre

<!-- exemple -->
<a href="#votreancre">Aller à l'ancre X</a>