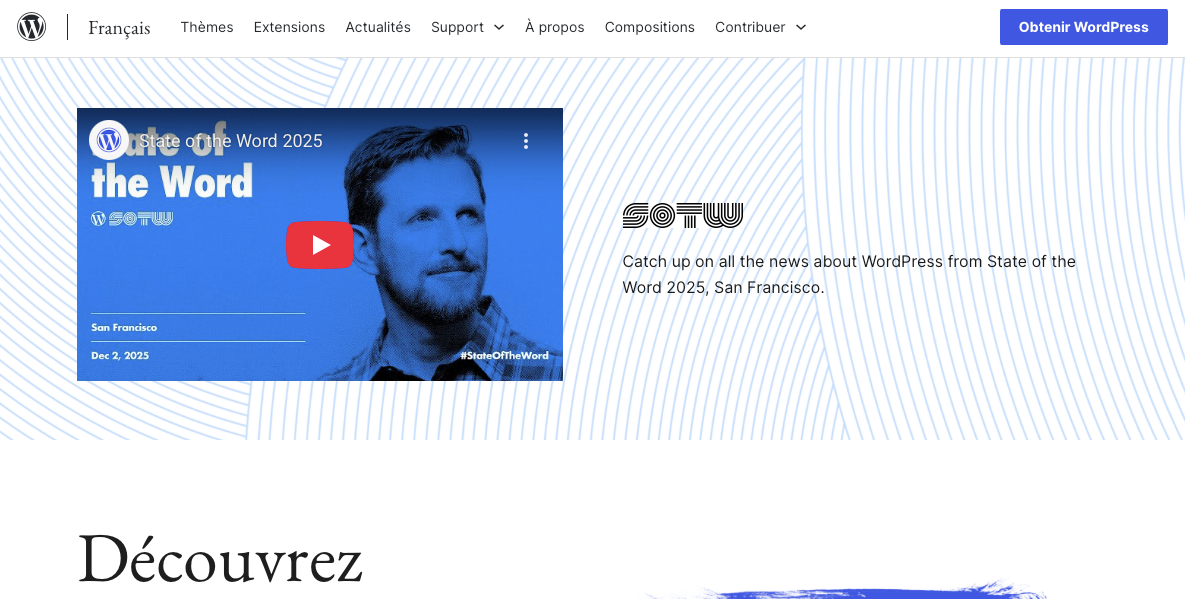
Télécharger la dernière version de WordPress (fr.wordpress.ORG pas .com)
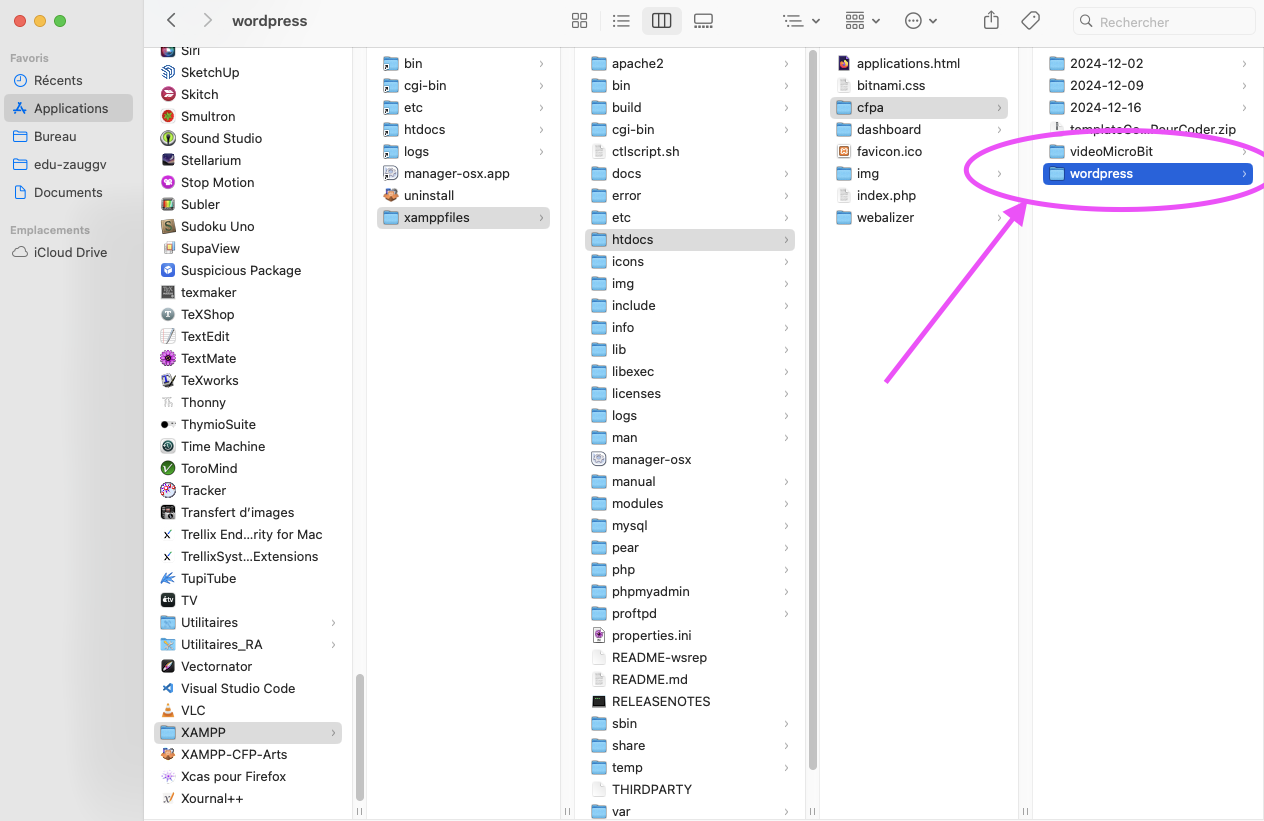
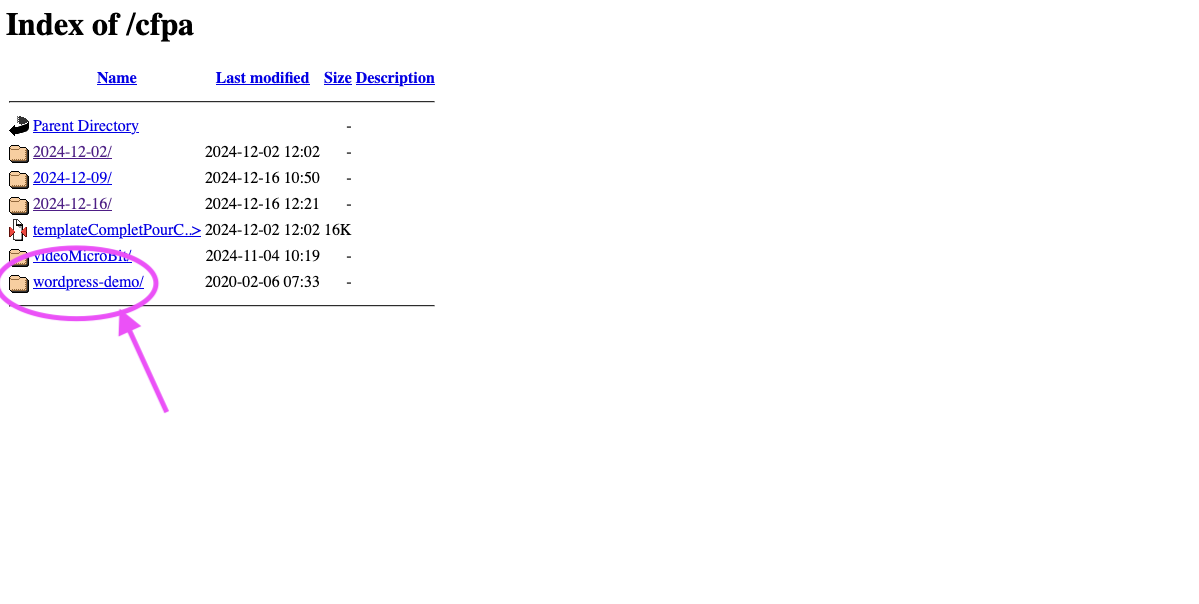
Copier le dossier dans votre server local (applications/xampp/htdocs/cfpa/)
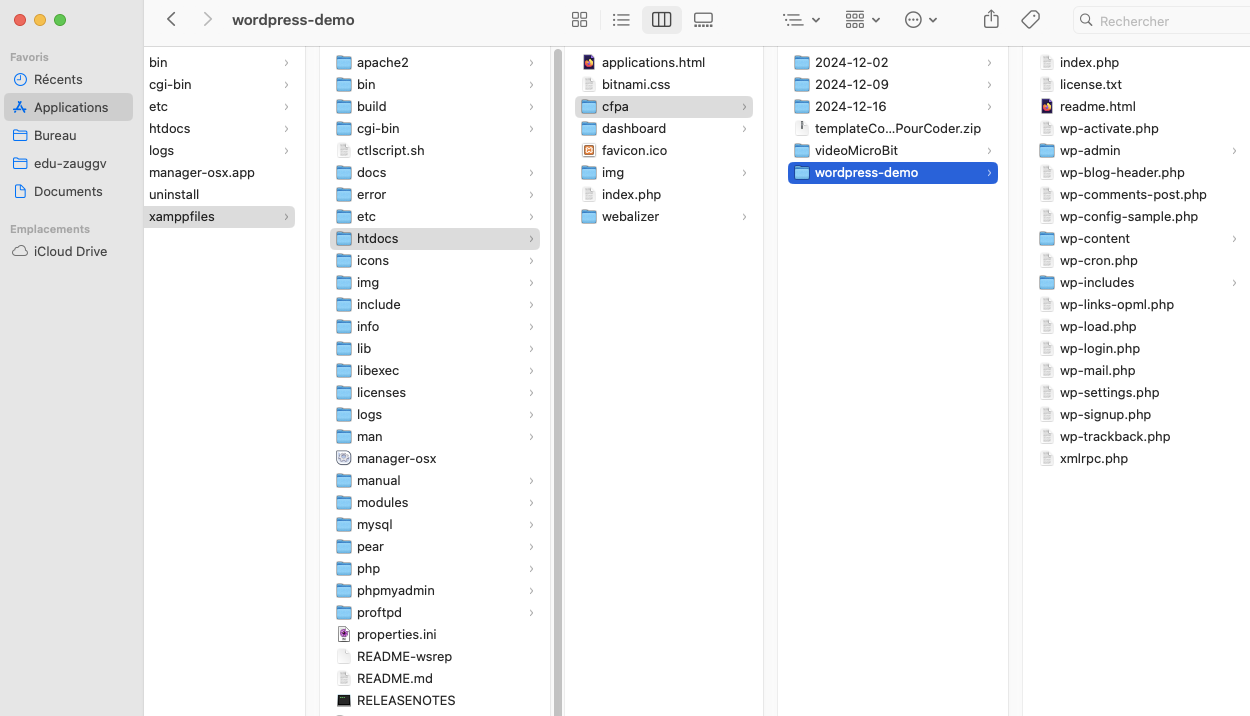
Renommer le dossier « wordpress »
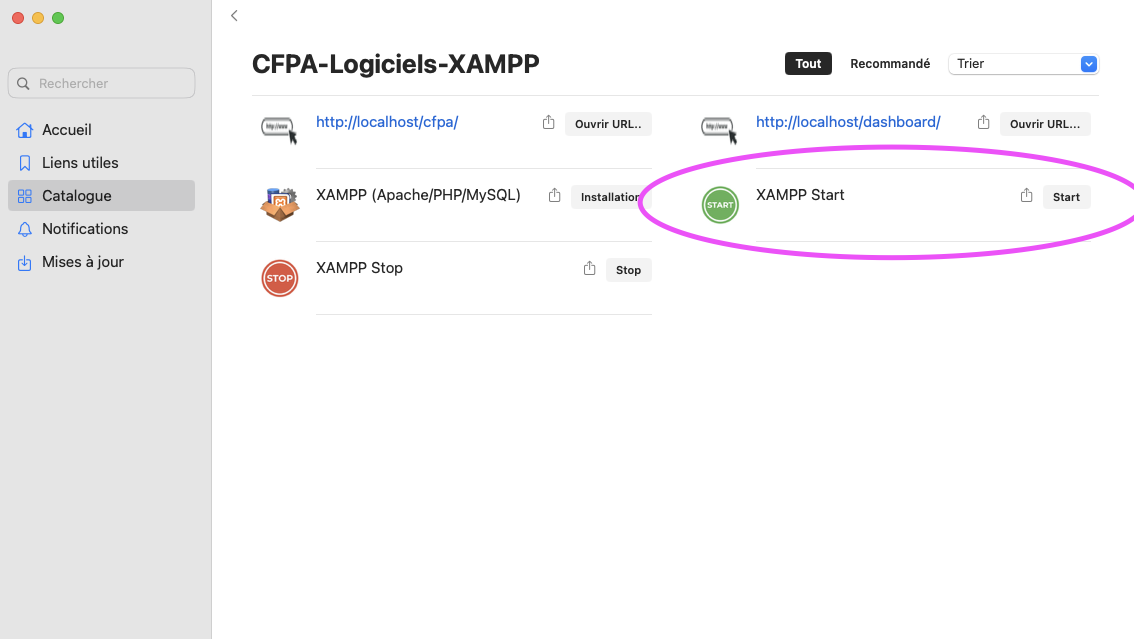
Redémarrer XAMPP pour redéfinir les drits d’accès sur les fichiers
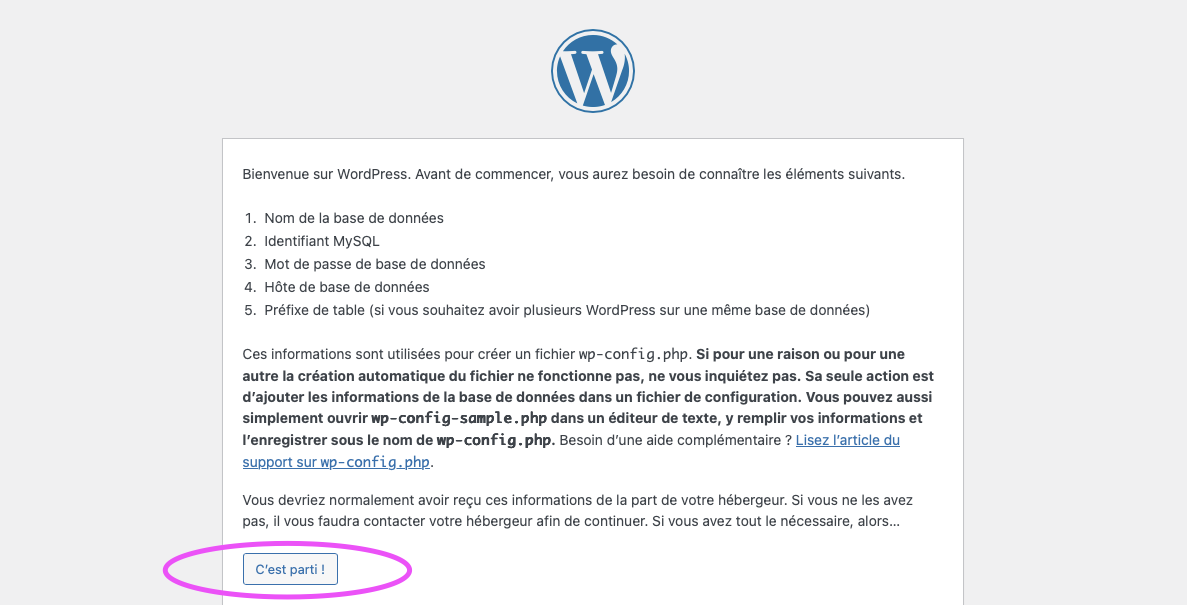
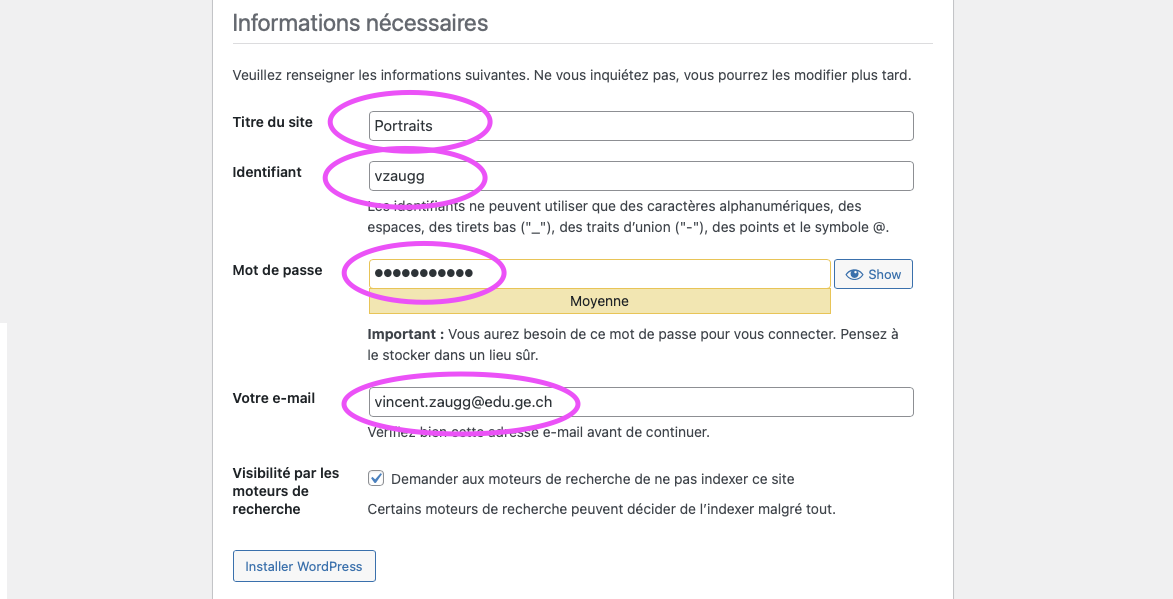
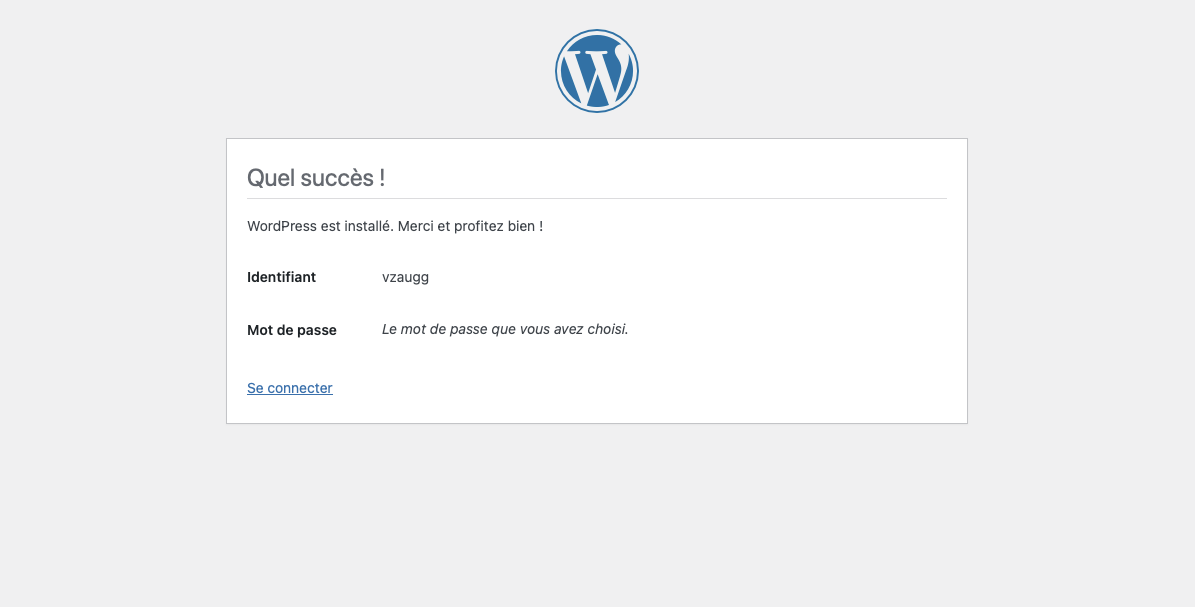
Part. 3: installation de WordPress
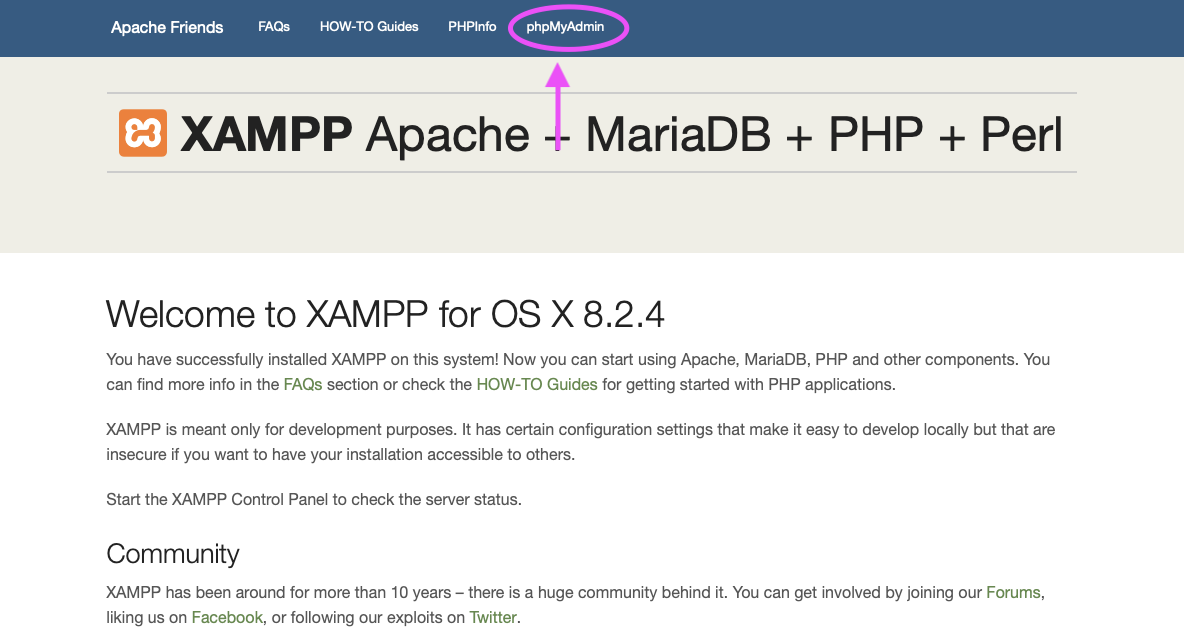
Entrez l’url de votre server local: http://localhost/cfpa/
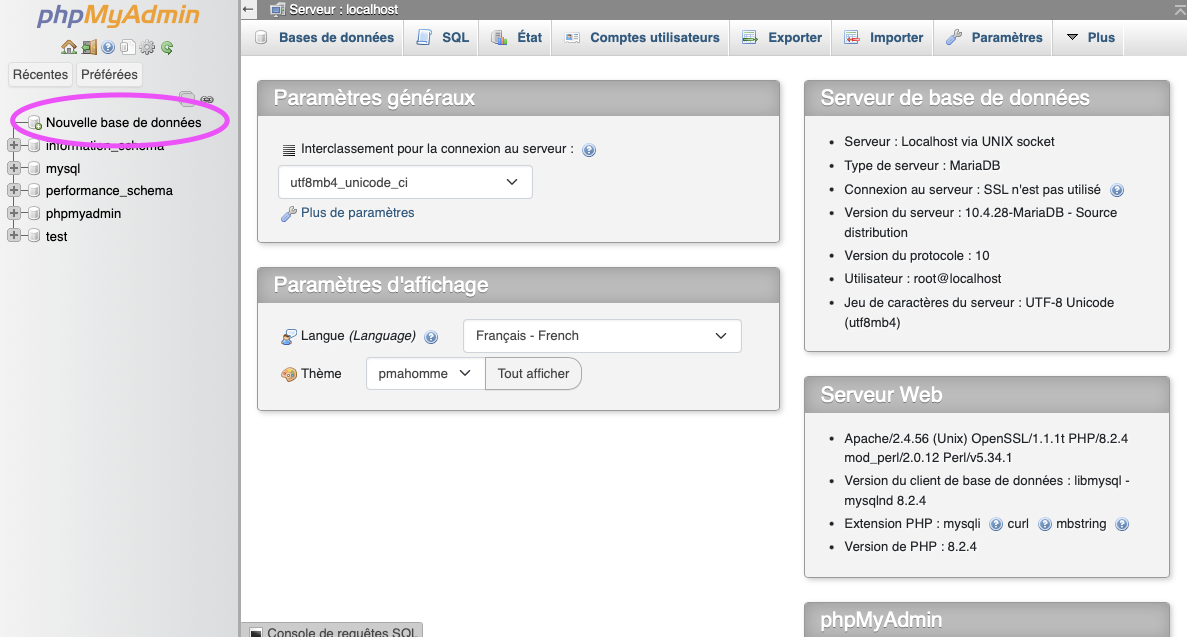
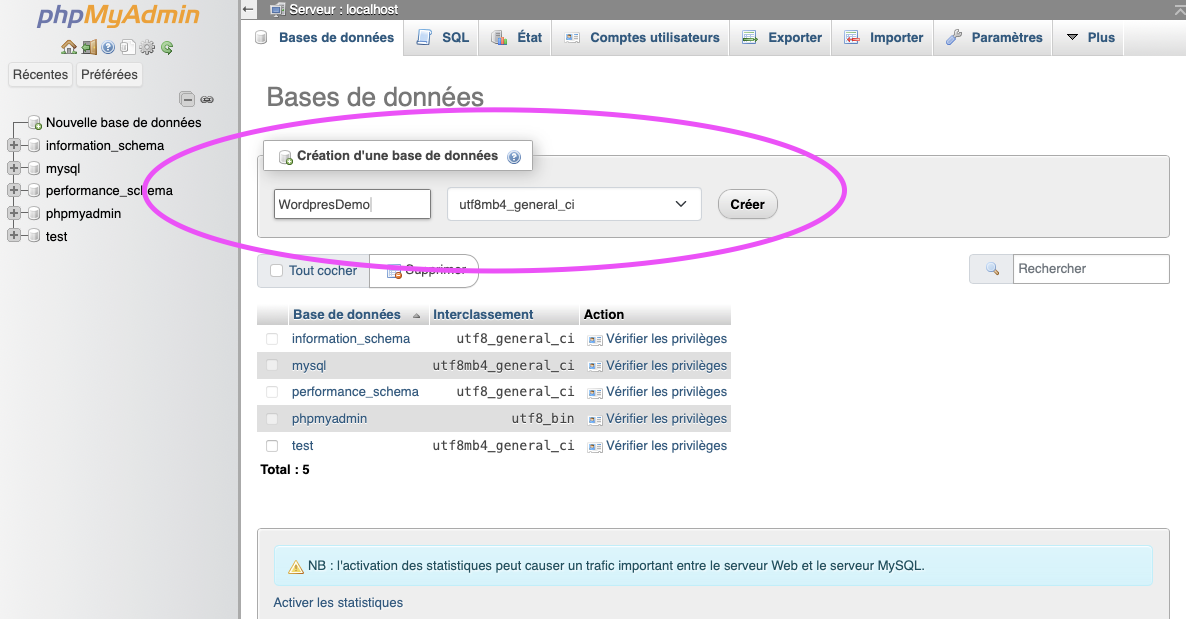
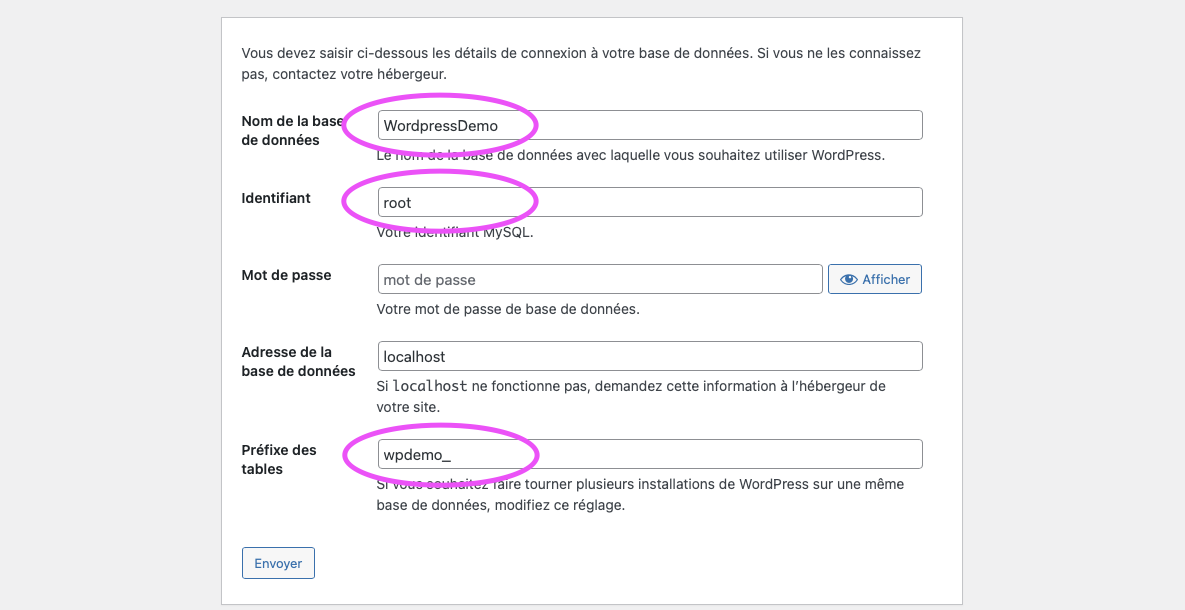
Entrer la nom de la base de données, l’identifiant « root », pas de mot de passe, adapter le préfixe des tables an gardant le « _ »
Pour changer la langue de WordPress en local, accédez à Réglages > Général > Langue du site. Si les options sont absentes, forcez la connexion directe dans wp-config.php en ajoutant define('FS_METHOD', 'direct'); pour permettre le téléchargement des packs de langue.
<!-- Slider main container -->
<div class="swiper">
  <!-- Additional required wrapper -->
  <div class="swiper-wrapper">
    <!-- Slides -->
    <div class="swiper-slide">Slide 1</div>
    <div class="swiper-slide">Slide 2</div>
    <div class="swiper-slide">Slide 3</div>
    ...
  </div>
  <!-- If we need pagination -->
  <div class="swiper-pagination"></div>

  <!-- If we need navigation buttons -->
  <div class="swiper-button-prev"></div>
  <div class="swiper-button-next"></div>

  <!-- If we need scrollbar -->
  <div class="swiper-scrollbar"></div>
</div>
Éditez le fichier archive.php Ajouter la structure dansla boucle « while »
<?php
/**
 * The template for displaying archive pages
 *
 * @link https://developer.wordpress.org/themes/basics/template-hierarchy/
 *
 * @package The_Way_Ball_Go_Theme
 */

get_header();
?>

	<main id="primary" class="site-main">
		<?php if ( have_posts() ) : ?>

			<header class="page-header">
				<?php
				the_archive_title( '<h1 class="page-title">', '</h1>' );
				the_archive_description( '<div class="archive-description">', '</div>' );
				?>
			</header><!-- .page-header -->


			<?php
			/* Start the Loop */
			while ( have_posts() ) :
				the_post();

				/*
				 * Include the Post-Type-specific template for the content.
				 * If you want to override this in a child theme, then include a file
				 * called content-___.php (where ___ is the Post Type name) and that will be used instead.
				 */
				get_template_part( 'template-parts/content-archive', get_post_type() );

			endwhile;

			the_posts_navigation();

		else :

			get_template_part( 'template-parts/content', 'none' );

		endif;
		?>


	</main><!-- #main -->

<?php
get_sidebar();
get_footer();
Fichier modifié
<?php
/**
 * The template for displaying archive pages
 *
 * @link https://developer.wordpress.org/themes/basics/template-hierarchy/
 *
 * @package The_Way_Ball_Go_Theme
 */

get_header();
?>

	<main id="primary" class="site-main">
		<?php if ( have_posts() ) : ?>

			<header class="page-header">
				<?php
				the_archive_title( '<h1 class="page-title">', '</h1>' );
				the_archive_description( '<div class="archive-description">', '</div>' );
				?>
			</header><!-- .page-header -->

<!-- Slider main container -->
<div class="swiper">
  <!-- Additional required wrapper -->
  <div class="swiper-wrapper">


			<?php
			/* Start the Loop */
			while ( have_posts() ) :?>

				<div class="swiper-slide">
<a href="<?php the_permalink(); ?>"
<?php the_post_thumbnail('thumbnail');?>
<?php the_title();?>
</a>
</div>


			<? endwhile;?>

</div>
  <!-- If we need pagination -->
  <div class="swiper-pagination"></div>

  <!-- If we need navigation buttons -->
  <div class="swiper-button-prev"></div>
  <div class="swiper-button-next"></div>

  <!-- If we need scrollbar -->
  <div class="swiper-scrollbar"></div>
</div>


			<?php the_posts_navigation();

		else :

			get_template_part( 'template-parts/content', 'none' );

		endif;
		?>


	</main><!-- #main -->

<?php
get_sidebar();
get_footer();
/**
 * Autoriser l'upload de tous types de format dans les médias
 */


add_filter('upload_mimes', 'wpm_myme_types', 1, 1);

function wpm_myme_types($mime_types){
	$mime_types['svg'] = 'application/postscript'; //On autorise les .svg
    $mime_types['glb'] = 'application/postscript'; //On autorise les .glb
    return $mime_types;
}
3. Copier le script dans le header.php
Éditez le fichier header.php et copier ce script juste après le début su div id= »page »:
4. Intégrer le script dans le contenu de vos articles
Éditez le fichier content.php (l’affichage du contenu d’un article) et copier ce script JUSTE AVANT la fermeture de l’article </article><!-- #post-<?php the_ID(); ?> -->
<script type="module">


 import * as THREE from 'three';
 import { OrbitControls } from  '<?php bloginfo('template_directory'); ?>/threejs/node_modules/three/examples/jsm/controls/OrbitControls.js';
 import { GLTFLoader } from '<?php bloginfo('template_directory'); ?>/threejs/node_modules/three/examples/jsm/loaders/GLTFLoader.js';
 import { DRACOLoader } from '<?php bloginfo('template_directory'); ?>/threejs/node_modules/three/examples/jsm/loaders/DRACOLoader.js';


let container, containerBox;
let cameraPersp, cameraOrtho, currentCamera;
let orbit, scene, raycaster, renderer, control;
const clock = new THREE.Clock();


init();
render();
animate();


function init() {
 container = document.getElementById( 'capture-<?php the_ID(); ?>' );
 containerBox = container.getBoundingClientRect();
 console.log(containerBox.width, containerBox.height);

 renderer = new THREE.WebGLRenderer( { alpha: true } );
 renderer.setPixelRatio( window.devicePixelRatio );
 renderer.setSize( containerBox.width, containerBox.height );
 // setClearColor(Couleur de fond de la 3D, transparance de 0 à 1)
 renderer.setClearColor( 0xffffff, 0 ); // the default

 container.appendChild( renderer.domElement );
 const aspect = containerBox.width / containerBox.height;

 // THREE.PerspectiveCamera(Champ de Vision FOV, ratio, près, loin)
 // currentCamera.position.set(x,y,z) // position de la caméra
 cameraPersp = new THREE.PerspectiveCamera( 33, aspect, 0.1, 1500 );
 currentCamera = cameraPersp;
 currentCamera.position.set( 1, 1, 0);
 currentCamera.lookAt( 0, 0, 0 );

 scene = new THREE.Scene();
 // THREE.Fog(Couleur du brouillard, transparance de 0 à 1, distance)
 scene.fog = new THREE.Fog( 0xffffff, 1, 1500 );

 // THREE.HemisphereLight(Couleur du la lumière, Couleur de l'ombre)
 const hemiLight = new THREE.HemisphereLight( 0xffffff, 0xffffff );
 // hemiLight.position.set(x,y,z) // Position de la lumière en x,y,z
 hemiLight.position.set( 0, 50, 0 );
 scene.add( hemiLight );

 const dracoLoader = new DRACOLoader();
 dracoLoader.setDecoderPath( '<?php bloginfo('template_directory'); ?>/threejs/node_modules/three/examples/js/libs/draco/gltf/' );

 const loader = new GLTFLoader();
 loader.setDRACOLoader( dracoLoader );

 loader.load( '<?php echo $captureUrl;  ?>', function ( gltf )  {
	 const model = gltf.scene;
	 model.name = 'capture-<?php echo $captureId; ?>'
	 //position initiale
	 model.position.set( 0, 0, 0 );
	 //taille initiale
	 model.scale.set( 1, 1, 1 );
	 scene.add( model );
 });

 orbit = new OrbitControls( currentCamera, renderer.domElement );
 orbit.update();
 orbit.addEventListener( 'change', render );

 window.addEventListener( 'resize', onWindowResize );
}

function onWindowResize() {
 const aspect = containerBox.width / containerBox.height;
 cameraPersp.aspect = aspect;
 cameraPersp.updateProjectionMatrix();
 renderer.setSize( containerBox.width, containerBox.height );
 render();
}

function animate() {
requestAnimationFrame( animate );
renderer.render( scene, currentCamera );
}

function onPointerMove( event ) {
 pointer.x = ( event.clientX / containerBox.width ) * 2 - 1;
 pointer.y = - ( event.clientY / containerBox.height ) * 2 + 1;
}

function render() {
 renderer.render( scene, currentCamera );
}

</script>
5. Intégrer la zone d’affichage de l’objet 3D
Éditez toujours le fichier content.php (l’affichage du contenu d’un article) et copier ce code JUSTE APRÈS l’ouverture de l’article <article id="post-<?php the_ID(); ?>" <?php post_class(); ?>>
Éditez le fichier style-custom.css et définissez la hauteur du canvas
/*
** 3D
*/
.canvas-box {
    height: 500px;
}
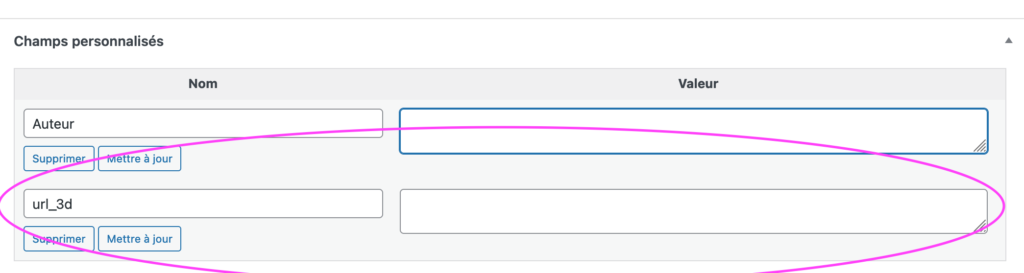
7. Créer un champ personnalisé « url_3d »
Dans l’éditeur wordpress, dans un article, créez le champ personnalisé « url_3d ».
8. Récupérer la valeur du champ « url_3d » dans le script
Éditez le fichier content.php (l’affichage du contenu d’un article) et copier ce code DANS le php en haut de l’article de l’article <?php /** * Template part for displaying posts * * @link https://developer.wordpress.org/themes/basics/template-hierarchy/ * * @package Capture3d */
Éditez le fichier functions.php et copier cette fonction:
/**
 * Autoriser l'upload de tous types de format dans les médias
 */


add_filter('upload_mimes', 'wpm_myme_types', 1, 1);

function wpm_myme_types($mime_types){
	$mime_types['svg'] = 'application/postscript'; //On autorise les .svg
    $mime_types['glb'] = 'application/postscript'; //On autorise les .glb
    return $mime_types;
}
3. Copier le script dans le header.php
Éditez le fichier header.php et copier ce script juste après le début su div id= »page »:
4. Intégrer le script dans le contenu de vos articles
Éditez le fichier content.php (l’affichage du contenu d’un article) et copier ce script JUSTE AVANT la fermeture de l’article </article><!-- #post-<?php the_ID(); ?> -->
<script type="module">


 import * as THREE from 'three';
 import { OrbitControls } from  '<?php bloginfo('template_directory'); ?>/threejs/node_modules/three/examples/jsm/controls/OrbitControls.js';
 import { GLTFLoader } from '<?php bloginfo('template_directory'); ?>/threejs/node_modules/three/examples/jsm/loaders/GLTFLoader.js';
 import { DRACOLoader } from '<?php bloginfo('template_directory'); ?>/threejs/node_modules/three/examples/jsm/loaders/DRACOLoader.js';


let container, containerBox;
let cameraPersp, cameraOrtho, currentCamera;
let orbit, scene, raycaster, renderer, control;
const clock = new THREE.Clock();


init();
render();
animate();


function init() {
 container = document.getElementById( 'capture-<?php the_ID(); ?>' );
 containerBox = container.getBoundingClientRect();
 console.log(containerBox.width, containerBox.height);

 renderer = new THREE.WebGLRenderer( { alpha: true } );
 renderer.setPixelRatio( window.devicePixelRatio );
 renderer.setSize( containerBox.width, containerBox.height );
 // setClearColor(Couleur de fond de la 3D, transparance de 0 à 1)
 renderer.setClearColor( 0xffffff, 0 ); // the default

 container.appendChild( renderer.domElement );
 const aspect = containerBox.width / containerBox.height;

 // THREE.PerspectiveCamera(Champ de Vision FOV, ratio, près, loin)
 // currentCamera.position.set(x,y,z) // position de la caméra
 cameraPersp = new THREE.PerspectiveCamera( 33, aspect, 0.1, 1500 );
 currentCamera = cameraPersp;
 currentCamera.position.set( 1, 1, 0);
 currentCamera.lookAt( 0, 0, 0 );

 scene = new THREE.Scene();
 // THREE.Fog(Couleur du brouillard, transparance de 0 à 1, distance)
 scene.fog = new THREE.Fog( 0xffffff, 1, 1500 );

 // THREE.HemisphereLight(Couleur du la lumière, Couleur de l'ombre)
 const hemiLight = new THREE.HemisphereLight( 0xffffff, 0xffffff );
 // hemiLight.position.set(x,y,z) // Position de la lumière en x,y,z
 hemiLight.position.set( 0, 50, 0 );
 scene.add( hemiLight );

 const dracoLoader = new DRACOLoader();
 dracoLoader.setDecoderPath( '<?php bloginfo('template_directory'); ?>/threejs/node_modules/three/examples/js/libs/draco/gltf/' );

 const loader = new GLTFLoader();
 loader.setDRACOLoader( dracoLoader );

 loader.load( '<?php echo $captureUrl;  ?>', function ( gltf )  {
	 const model = gltf.scene;
	 model.name = 'capture-<?php echo $captureId; ?>'
	 //position initiale
	 model.position.set( 0, 0, 0 );
	 //taille initiale
	 model.scale.set( 1, 1, 1 );
	 scene.add( model );
 });

 orbit = new OrbitControls( currentCamera, renderer.domElement );
 orbit.update();
 orbit.addEventListener( 'change', render );

 window.addEventListener( 'resize', onWindowResize );
}

function onWindowResize() {
 const aspect = containerBox.width / containerBox.height;
 cameraPersp.aspect = aspect;
 cameraPersp.updateProjectionMatrix();
 renderer.setSize( containerBox.width, containerBox.height );
 render();
}

function animate() {
requestAnimationFrame( animate );
renderer.render( scene, currentCamera );
}

function onPointerMove( event ) {
 pointer.x = ( event.clientX / containerBox.width ) * 2 - 1;
 pointer.y = - ( event.clientY / containerBox.height ) * 2 + 1;
}

function render() {
 renderer.render( scene, currentCamera );
}

</script>
5. Intégrer la zone d’affichage de l’objet 3D
Éditez toujours le fichier content.php (l’affichage du contenu d’un article) et copier ce code JUSTE APRÈS l’ouverture de l’article <article id="post-<?php the_ID(); ?>" <?php post_class(); ?>>
Éditez le fichier style-custom.css et définissez la hauteur du canvas
/*
** 3D
*/
.canvas-box {
    height: 500px;
}
7. Créer un champ personnalisé « url_3d »
Dans l’éditeur wordpress, dans un article, créez le champ personnalisé « url_3d ».
8. Récupérer la valeur du champ « url_3d » dans le script
Éditez le fichier content.php (l’affichage du contenu d’un article) et copier ce code DANS le php en haut de l’article de l’article <?php /** * Template part for displaying posts * * @link https://developer.wordpress.org/themes/basics/template-hierarchy/ * * @package Capture3d */
N’oubliez pas remplacer is_category(‘books’) par is_category(‘slugdevotrecategorie’) ou, pour plusieurs catégories: is_category(array(‘slugdevotrecategorie1’,‘slugdevotrecategorie2‘,’slugdevotrecategorie3′)) ou
@media screen and (min-width: 37.5em) {

	.menu-toggle {
		display: none;
	}

	.main-navigation ul {
		display: flex;
	}
}
Changer la valeur du media query
@media screen and (min-width: 300000px) {  // pour afficher en permanance le burger menu

	.menu-toggle {
		display: none;
	}

	.main-navigation ul {
		display: flex;
	}
}
Par défaut, votre thème de base (Underscore) affiche dans une catégorie la totalité du contenu de chaque article. Cela n’est pas très ergonomique si vous avez beaucoup d’articles.
Il serait plus logique d’avoir un extrait du contenu et, si on souhaite en savoir plus: on clique pour obtenir la totalité du contenu de l’article.
Le concept
Le fichier archive.php
Observer le fichier archive.php
/* Start the Loop */
	while ( have_posts() ) :
	the_post();

	/*
	* Include the Post-Type-specific template for the content.
	* If you want to override this in a child theme, then include a file
	* called content-___.php (where ___ is the Post Type name) and that will be used instead.
	*/
	get_template_part( 'template-parts/content', get_post_type() );

	endwhile;
C’est un exemple d’application d’une boucle wordpress (loop). De quoi s’agit-il?
La Boucle (The Loop) est utilisée par WordPress pour afficher chacun de vos Articles. Par l’utilisation de La Boucle, WordPress traite tous les Articles devant être affichés sur la page active et adapte leur présentation en utilisant les critères décrits par les marqueurs de La Boucle. Tous les morceaux de code HTML ou PHP placés entre le début et la fin de La Boucle seront exécutés pour chaque Article.
/* Start the Loop */
	while ( have_posts() ) :
	the_post();

	/*
	* Include the Post-Type-specific template for the content.
	* If you want to override this in a child theme, then include a file
	* called content-___.php (where ___ is the Post Type name) and that will be used instead.
	*/
	get_template_part( 'template-parts/content-archive', get_post_type() );

	endwhile;
Mise en page particulière pour chaque catégorie.
Il est possible d’avoir, pour chaque catégorie, une mise en page particulière. Nous n’utilisons alors plus archive.php mais category-slug.php où slug est le nom informatique de la catégorie (sans accent, espace ou majuscule). On duplique archive.php et on le renomme selon la catégorie concernée. On oublie pas de préciser le fichier de contenu.
Exemple: category-actualites.php
/* Start the Loop */
	while ( have_posts() ) :
	the_post();

	/*
	* Include the Post-Type-specific template for the content.
	* If you want to override this in a child theme, then include a file
	* called content-___.php (where ___ is the Post Type name) and that will be used instead.
	*/
	get_template_part( 'template-parts/content-category-actualites', get_post_type() );

	endwhile;